How To Put Up A Simple Timber Fence
Simple steps to a sturdy vertical slatted fence.


Step 1: Mark Out The Line
Stretch a string line tightly between two stakes to mark the exact path of your fence.
Use a tape measure to mark where each post will go, remembering to account for the width of the posts themselves.
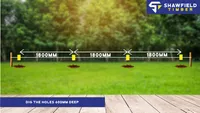
The fence post centres for a standard vertical/horizontal slatted fence are usually around 6ft, but this may change depending on the length of the rails.
Our rails are 3.6m long and will span across three posts set at 1.8 m post centres.
If the post spacing doesn't divide equally, leave a smaller gap at the end or in a place that is least noticeable.
Step 2: Dig the Post Holes
Dig holes for your posts.
A good rule of thumb is to dig down one-third of the post's total length.
For a 6ft (1.8m) fence height, you'll want posts that are around 8ft (2.4m) long, so the hole should be about 2ft (0.6m) deep.

Step 3: Set the Posts
Place your first post in the hole. Use a spirit level to make sure it's perfectly straight (plumb) in both directions.
You might need some temporary wooden supports to hold it while you work.
Now, add your Postcrete according to the instructions on the bag and leave it to set.
Step 4: Attach the Fence Rails
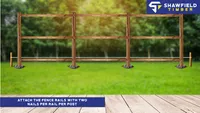
Next, fix your horizontal fence rails between the posts.
Secure the rails to the posts with two nails, per rail, per post.
For a 6 ft high vertical fence, you will most likely need three rails (top, middle, bottom); two rails may suffice for shorter heights of fencing.
Step 5: Attach the Vertical Slats
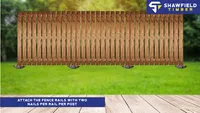
First Slat: Start at one end of a fence section. Attach your first vertical slat to the outside face of the horizontal rails, ensuring it's plumb (perfectly vertical) using your spirit level. Use two screws or nails per rail (top, middle, bottom) into the slat.
The default slat spacing on our calculator is 19mm to match the width of our boards, so you can turn one of your fence slats sideways to use it as a spacer.
Use Your Spacer: Place your spacer against the first installed slat.
Next Slat: Place your next slat firmly against the spacer. Double-check it's plumb with your spirit level.
Fix and Repeat: Screw or nail this slat into the rails. Then, remove the spacer block, move it to the side of the new slat, and repeat the process for all subsequent slats across the section.
Even Spacing Check: Before fixing the very last slat in a section, quickly check if the remaining gap matches roughly what you expect for your chosen gap plus a full slat. You might need to adjust the gap slightly across the section if your measurements aren't exact.
Trim (if needed): Once all slats are in place, you may need to trim the top of the fence to a consistent height using a saw.
Step 6: Finishing Touches
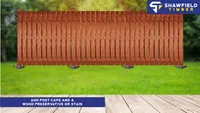
Add post caps to the top of timber posts to protect them from the weather.
Apply a good quality wood preservative or fence paint to all timber surfaces. This is essential for protecting your fence from rot, UV damage, and insects, making it last much longer.
Ready to get started?
Use our Fencing Calculator to work out everything you need instantly.