How To Install Decking Handrailing
Simple steps to sturdy deck railing.

Important Pre-Installation Considerations:
- Local Regulations: Before commencing any work, thoroughly check your local planning permission and building codes. Handrail height, spacing, and structural requirements can vary significantly by region and must be adhered to.
- Material Selection: This guide assumes the use of newel posts, spindles, and railing sections with infill. Ensure your chosen materials are suitable for outdoor use and meet any relevant safety standards.
Use our Decking Calculator to work out everything you need instantly, including handrailing..
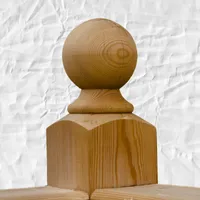
Step 1: Install Newel Posts
- Placement: Identify the corners of your decking area where handrailing will be installed. Place a newel post in each corner. For longer sections, insert additional newel posts at even intervals, ensuring they are no more than 1800mm apart.
- Anchoring: Position each newel post by "jambing" it between the main joists of your deck. If your deck utilises deck posts, the newel post should also be secured to these, where possible, for added stability.
- Height Adjustment: The newel post should sit approximately 100mm below the top surface of the main joist. This allows the decking boards to be laid, resulting in an overall visible newel post height that is typically around 130mm less than the total post length, depending on the thickness of your decking boards.
- Secure Newel Posts: Using your drill/driver, secure each newel post in place. Drive four coach screws (two on each of the two adjacent sides) through the joists directly into the newel posts. Ensure they are firmly anchored and plumb using a spirit level.
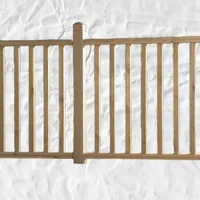
Step 2: Prepare Railing Sections (for each span between newel posts)
- Measure and Cut Railing Lengths: Accurately measure the exact width between the two newel posts for the section you are working on. Using your saw, cut one length of infill and two lengths of railing (one for the top rail, one for the bottom rail/baserail) to this precise measurement.
- Calculate Spindle Quantity: To determine the number of spindles needed for this section, divide the measured width between the newels by 141mm (this figure accounts for a 100mm gap plus the typical 41mm width of a spindle). Always round this number up to ensure sufficient spindles.
- Formula: Number of Spindles = (Width between Newels / 141mm) rounded up.
- Space Spindles on Bottom Rail: Lay one of your cut railing lengths flat. This will serve as your bottom rail/baserail. Place the calculated number of spindles equally along the bottom railing. Crucially, ensure that no gap between spindles (including the gaps at each end of the section, between the end spindle and the newel post) is larger than 100mm.
- Secure Spindles to Bottom Rail: Once you are satisfied with the even placement and spacing of the spindles, use your drill/driver to screw a decking screw through the bottom railing into the bottom end of each spindle.
- Secure Spindles to Infill: Take your cut length of infill. Align it with the top ends of the spindles. Screw a decking screw through the infill into the top end of each spindle. This creates a pre-assembled "ladder" section for your handrailing.
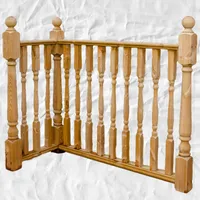
Step 3: Install Railing Assembly
- Position Railing Assembly: Carefully raise the assembled bottom railing, infill, and spindles (your "ladder" section) between the two newel posts.
- Height Clearance: Ensure that the gap between the top surface of your decking boards and the bottom edge of the bottom railing is no larger than 100mm. This is a crucial safety and building code requirement.
- Attach Bottom Railing: Using your drill/driver, attach the bottom railing assembly to the newel posts. Drive 4 coach screws (2 at each end of the bottom railing) at a 45-degree angle through the bottom railing into the newel post. This angled insertion provides strong lateral support.
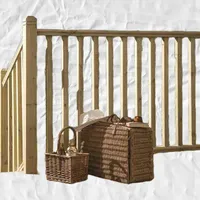
Step 4: Install Top Railing
- Fit Top Railing: Measure and cut the remaining length of railing (this will be your top handrail). Place it over the infill at the top of the railing assembly, ensuring it sits flush and covers the infill and the top ends of the spindles.
- Attach Top Railing: Secure the top railing to the newel posts in the same manner as the bottom railing. Drive four coach screws (two at each end of the top railing) at a 45-degree angle downwards through the top railing into the newel post.
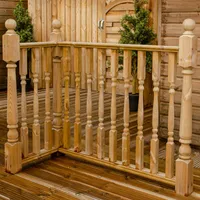
Step 5: Final Touches
- Repeat for All Sections: Repeat Steps 2, 3, and 4 for all remaining sections of handrailing around your deck.
- Decking Board Notching: Remember that once your handrailing is installed, you will need to cut out sections (notch) your decking boards to fit neatly around the installed newel posts as you lay them.
- Inspect and Secure: Once all sections are installed, conduct a thorough inspection. Ensure all screws are tight, the railing is sturdy, and all gaps meet safety regulations. Apply any necessary timber treatment or finish to protect your handrailing from the elements.