How To Fit A Bifold Door
Bifold door installation can be completed within an hour without much difficulty, however it does require some care and attention.

Most modern homes will now feature bifolding doors as they are a popular choice for interior designers. An internal bifold door operates by folding and sliding along a track and is perfect for small spaces like closets, cupboards or bathrooms.
You must first remove the old door and track then repair the door opening, such as painting and filling the screw holes. Next, you have to measure the frame opening to determine what bifold door you need to purchase. Bifold doors are made undersized to fit the door opening and allow for operation. The actual door dimensions can be found in the product description.
Simply measure the door opening and find the bifold door suitable to fit the opening size. Before fitting anything make sure you have all the tools and hardware ready and have correctly measured the door frame.
Cutting or trimming Bi-Fold doors is not usually recommended, as most bi-folds have a hollow core, and trimming could expose the core. Make sure your doors have been finished with paint or oil (if desired) before beginning to hang. Do not install handles until after the doors have been hung.
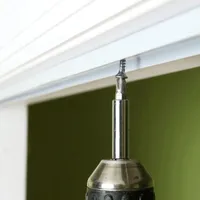
Step 1: Install Track
Ensure the track is flush and centred within the door frame. The pivot bracket should be positioned at the side of the frame that will be used for opening direction. There should be a small gap of up to 2mm on each end of the track inside the door frame.
Using the screw holes in the track mark the location of the pivot points with a pencil. Then pilot drill the positions to secure the bifold door track in place.
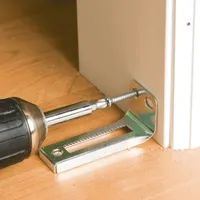
Step 2: Install Bottom Pivot Bracket
Measure and mark downwards the door height you purchased.
Pencil mark inside 20mm from the outside of the frame. This is where the bottom pivot bracket will be installed.
Secure in place, then slot the plastic retainer into the bracket.
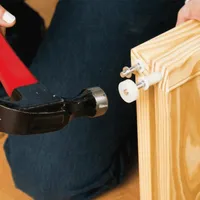
Step 3: Install Top Pin Pivot and Roller
Prop the door up to identify where the top pin pivot and top roller guide will be positioned.
Slot the pivots separately into the drilled holes on the top of the doors using light taps from a mallet or hammer if necessary.
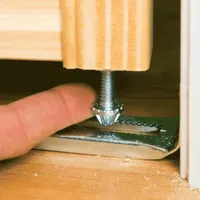
Step 3 Continued:
Install the bottom pivot to the bottom of one door.
Prop the door up to identify where the top pin pivot and top roller guide will be positioned.
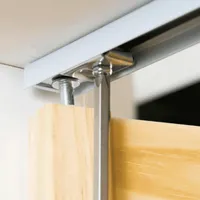
Step 4:
Unscrew and release the top pivot in the track and prop the door back up to the opening.
Slot the bottom pivot into the bottom bracket.
Engage the pivots into the track, the door should now slide freely.
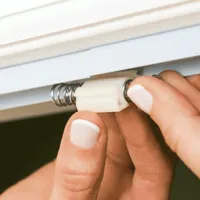
Step 4 Continued:
Slot bottom pivot into the bottom bracket.
Add spring closer at the other side to hold the door closed and allow for spring opening.
The door height can be adjusted using the bottom pivot.
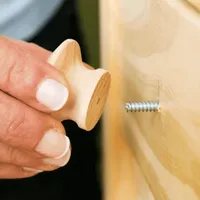
Step 5: Attach Handle
Finally, you can attach your bifold door handle or knob.
Drill the screw through and attach the knob, the door should be flush and open/close smoothly.
Make any adjustments using the lower pin pivot.
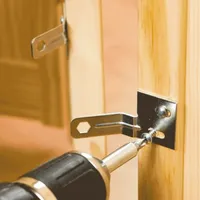
Optional Step 6: Door Alignment Brackets
(Optional) Attach the door alignment brackets on the inside of the door if required. These are only required if you are installing four leaves (multiple bifold doors).
We have found an excellent video on how to easily install Bifold Doors on youtube (credit to Steves & Sons).
Our doors are the exact same ones used in the video, with the parts included for free: check them out